
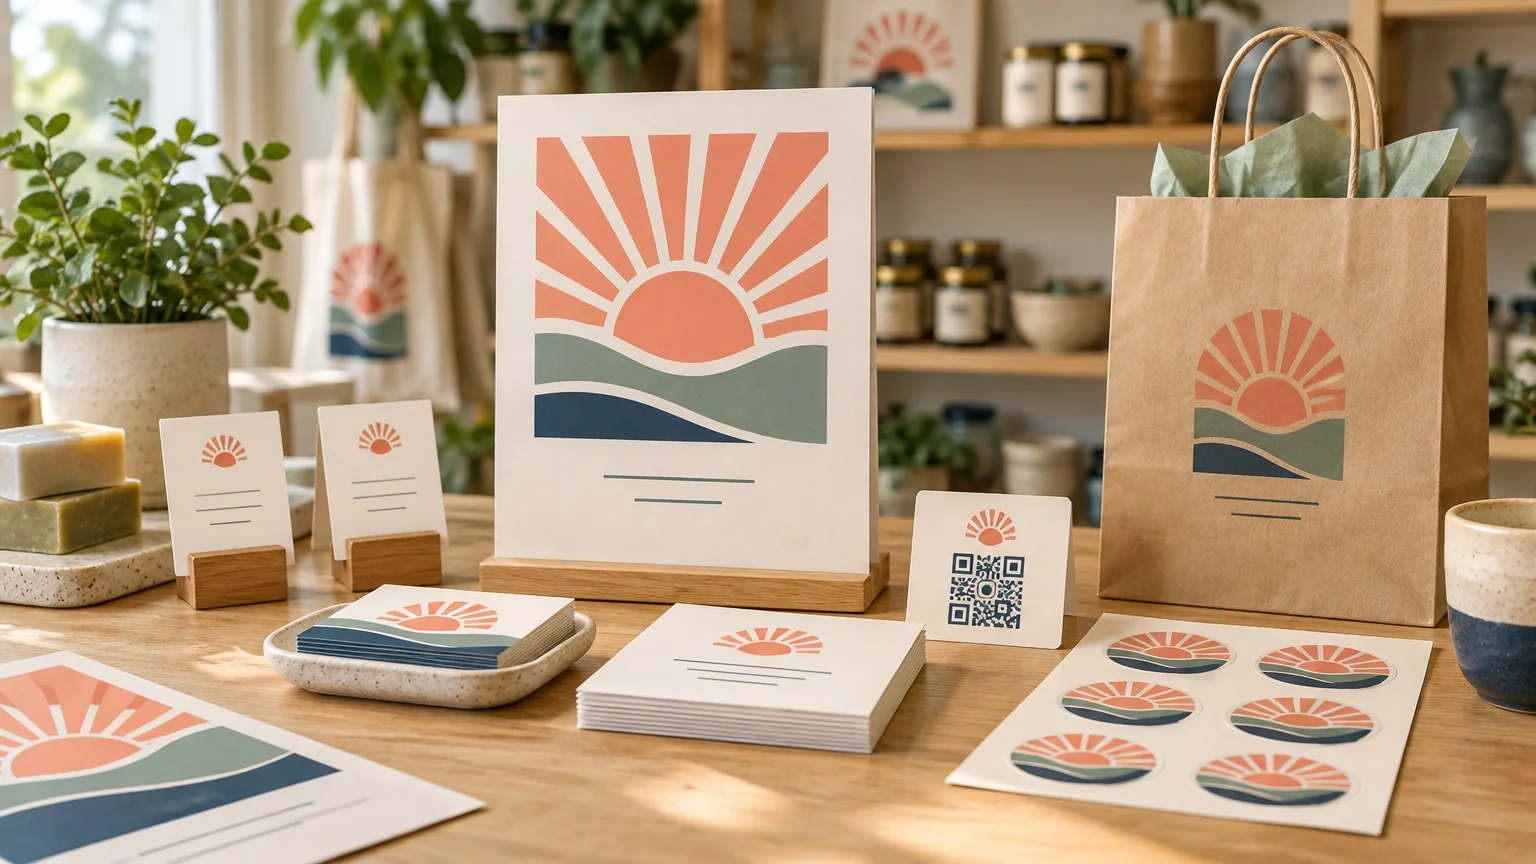
TL;DR: Build the smallest useful print kit
A good pop-up shop does not need a mountain of printed material. Start with one attention-grabbing sign, clear price cards, one QR-code piece, branded stickers or labels, and a take-home insert. Add table signs, bags, or flyers only when they solve a specific problem. Keep the same colors, typefaces, logo treatment, and call to action across every piece so the setup looks like one compact shop rather than a collection of unrelated print orders.
Plan around the customer journey
Before choosing sizes or finishes, picture the customer moving through the space. Your printed materials have four jobs: attract attention, explain what you sell, make prices easy to find, and give shoppers a way to reconnect after leaving.
That sequence helps prevent a common mistake: spending heavily on attractive packaging while forgetting the sign that tells people what the business is. Put visibility and clarity first. The decorative extras can follow if the budget allows.
| Customer moment | Useful printed piece | Main job |
|---|---|---|
| Approaching the shop | Poster or rigid sign | Identify the brand and offer from a distance |
| Browsing the table | Price cards or table tents | Explain products, prices, bundles, and options |
| Considering a purchase | QR card or small flyer | Provide details without crowding the display |
| Completing a purchase | Bag label, sticker, or insert | Reinforce the brand and encourage a return visit |
| Leaving without buying | Business card or takeaway card | Create an easy path back to the website or social profile |
Choose one strong main sign
Your main sign should answer three questions quickly: Who are you, what do you sell, and why should someone stop? A logo by itself rarely does all three. Pair it with a short description such as “Small-batch candles poured locally” or “Illustrated gifts inspired by city landmarks.”
For a tabletop setup, an 18 × 24-inch poster or similarly sized rigid sign is often a practical starting point. FedEx Office lists poster formats from 16 × 20 through 36 × 48 inches and offers foam-board mounting when a lightweight rigid display is needed. Availability and turnaround depend on the order and location. Choose the final size according to viewing distance, booth rules, and the stand or wall space you can actually use.
Keep the headline large, shorten the supporting copy, and leave open space around the message. A shopper walking past should not have to stop and read a paragraph before understanding the offer.
Make prices visible and consistent
Hidden prices create unnecessary friction. Use small folded cards, mini signs, or table tents beside products and organize them with one repeatable format: product name, short detail, price, and any bundle offer.
Paper table tents suit short events or messages that change regularly, while reusable plastic displays can make sense for a recurring market schedule. One currently listed FedEx paper option is a 4 × 6-inch scored display printed flat and folded into a two-sided tent. You can also print cards and place them in reusable holders, which makes last-minute price changes less painful.
Do not make every price card compete for attention. Use one type size for product names, another for prices, and a small third level for details. If shoppers must compare several variations, a single menu-style sheet may be clearer than a forest of tiny signs.
Treat QR codes as functional print elements
A QR code can lead to checkout, an email signup, a product catalog, event-only content, or a social profile. Give it one destination and label that action plainly. “See all colors” is more persuasive and useful than “Scan me.”
Leave clean space around the code. The GS1 2D barcode guideline specifies a quiet zone of at least four module widths on every side and warns that weak contrast, multiple colors, and visual noise can interfere with scanning. Adobe likewise recommends strong contrast, undistorted finder patterns, and physical testing at the actual printed size and expected viewing distance. Adobe’s QR design guidance
Test the final printed proof with several phones before the event. Check it in ordinary indoor lighting, from the distance shoppers will use, and after placing the card in its holder. A perfectly functional code can become awkward when glare, a table edge, or nearby merchandise blocks it.
Use stickers, bags, and inserts strategically
Stickers are useful because they can work as packaging seals, purchase bonuses, or inexpensive branded handouts. Individually cut stickers are convenient for giveaways and inserts, while roll labels are better suited to repeated packaging application. CustomStickers offers both stickers and labels, including laminated vinyl stickers in matte and gloss finishes. CustomStickers
If custom-printed bags would stretch the budget, buy plain bags and apply a consistent branded label. Add a small postcard or card insert with care instructions, a thank-you message, the shop URL, and one clear invitation to return. Staples specifically presents advertising labels as an option for bags and merchandise and postcards as customer-order inserts.
Avoid loading every item with a different promotion. One memorable message repeated across a sign, sticker, and insert will usually feel more polished than several competing discount codes and social handles.
Prepare one coordinated set of files
Build the designs together before placing separate orders. Set a small visual system with one headline typeface, one body typeface, two or three brand colors, a standard logo position, and a consistent QR-code treatment.
For artwork extending to the edge, add the printer’s required bleed and keep important text and logos inside the safe area. Canva’s default bleed for applicable trimmed products is 0.125 inch on each side, but the company advises checking an outside printer’s requirements before export. Canva’s bleed and margin guidance For a closer look at these production zones, use this guide to bleed and safe areas for small-business print.
Export according to the selected printer’s specifications rather than assuming every vendor wants the same file. Canva identifies PDF Print as its print-oriented, 300 dpi export and offers options that can include bleed and crop marks. A final review of dimensions, spelling, prices, links, and image resolution is still essential; the broader print-ready file workflow can help catch problems before ordering.
A compact pop-up print checklist
- One main brand-and-offer sign
- Price cards for every product or clearly defined product group
- One QR-code card with a specific call to action
- A menu, product guide, or flyer only if shoppers need more explanation
- Branded stickers or labels for packaging and handouts
- Plain or printed shopping bags sized for the products
- A thank-you, care, or reorder insert
- Business cards or takeaway cards for visitors who do not buy
- Reusable holders, easels, clips, or frames for displaying the pieces
- A small backup pack containing spare price cards, labels, tape, markers, and blank cards
Order in priority order, not all at once
First approve the main sign, price system, and QR destination. Then order stickers, labels, inserts, and optional handouts. This order protects the pieces that make the shop understandable if time or money runs short.
Place the full kit on a table before the event and photograph it from several feet away. Remove anything repetitive, enlarge anything hard to read, and check that products remain the focus. The best next step is simple: list each moment in the customer journey, assign no more than one primary printed piece to it, and request proofs before committing to the full quantity.
References
- Custom Poster Prints on Heavyweight Paper | FedEx Office
- Custom Table Tents: Table Tent Printing | FedEx Office
- 2D Barcodes at Retail Point-of-Sale Implementation Guideline
- QR Code Best Practices to Create QR Codes That Work | Adobe Express
- Custom Stickers | Fast & Free Shipping – CustomStickers.com
- Custom Marketing Materials | Staples®
- Use margins, bleed, rulers, and crop marks – Canva Help Center
- Choose the right download file type for your Canva design – Canva Help Center